
Having a motion sensor control multiple lights is convenient for many reasons. The risks of accidental activation are lower, and the efficiency of the whole system helps save money.
Besides, don’t they just look cool? Automatically activated lights were a dream years ago, and now it’s a luxury that you can have at your own home.
Truly outstanding.
In this article, you’ll learn how to wire a motion sensor to multiple lights. That way, you’ll be in a better position to do it yourself.
This way, you get to save money that you’d spend hiring a professional. Plus, this step-by-step guide will allow you to understand how the system works.
Without anything else to add, let’s begin with the basics.
Cost of Wiring a Motion Sensor to Lights
The cost of a project is often the indicator of whether or not to pull the trigger. In this case, installing a motion sensor with multiple lights can be a bit expensive. But, it also depends on the quality of the fixtures you’ll be using.
For instance, the average cost range of motion sensor lights is between $300 and $500. The minimum is $220, while the maximum is $550. This also varies depending on how many lights you wish to connect.
Overall, the average cost to pull off this project would be around $370.
Benefits of Wiring A Motion Sensor to Multiple Lights
The reasons to have one sensor connected to multiple lights are many. This section explores some of the most prominent ones.
Security
One of the main reasons to have motion sensor lights is because of security concerns. In that regard, nothing is more helpful a having several lights connected to a single motion sensor.
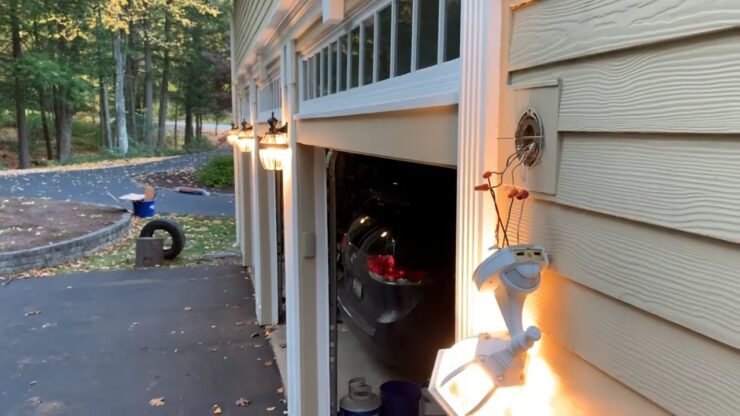
This will give you instant illumination, leading to a clear view of your surroundings. If anyone or anything walks around the house, the lights will activate simultaneously. This will show who or what is passing around.
Decoration
Besides security, another benefit is that the lights will be a fantastic decorative addition.
Since they activate with one single motion sensor, the illumination goes up instantly. This is perfect when you walk around the garden or exit the house via the backyard.
Energy Efficiency
With fewer motion sensors used, the energy saved makes up for less money paid in electricity bills.
Furthermore, you could go for energy-efficient lights and reduce costs even more. A stylish and efficient light system, who wouldn’t want that?
Flexibility
Though they’re perfect for outdoor areas, the fact is that motion sensor lights are perfect everywhere.
Put them at the front, at the backyard, on the sides, or anywhere you want. Besides, you can use them to get more security or for decoration.
A Fun DIY Project
Another side benefit of such a project is that it’s super fun to do. Plus, once you see the results, the time and effort put into it feels rewarding.
If you want to add luxury to the house and enjoy a challenge, setting up a motion sensor to multiple lights may be what you need.
Tools (List the Required Tools)
If you already enjoy DIY projects, then these are tools you probably have around the house. Otherwise, you’d have to buy them and add them as more expenses.
- A Set of Screwdrivers.
- Voltage Testerinstant illumination. Preferably a touch-type device.
- Wire Connectors.
- Motion Sensor.
- Electrical Tape.
- Wire Strippers.
Step by Step Guide: How to Wire A Motion Sensor to Multiple Lights

Ready to learn how to connect the motion sensors to lights? Then let’s not wait any longer. Read and follow these steps thoroughly to guarantee a successful operation.
Step 1: Preparations
Preparation is vital to avoid putting yourself in harm’s way. Start by turning off the lighting circuit’s power, which will prevent electric shocks. Make sure to shut down the breaker and not the light switch.
Once you get that done, proceed to take out the light bulbs. Remove them from the fixture where you’ll be installing the motion sensor.
Step 2: Disassemble the Fixture
Using a screwdriver, start to disassemble the fixture to gain access to the wiring. But wait!
Before touching the wires, use a voltage tester to check the circuit’s status. If it doesn’t trigger the light or beeping sound, then that means you’re good to go.
Step 3: Working the Wire Connections
Continue by disconnecting the wire connections, those that set the fixture to the wall cables. These connections also include the wires that lead to the rest of the fixtures.
Step 4: Remove Knockout
Next, you’ll be removing a knockout on the wall box that will hold the motion sensor.
You can do this using a screwdriver and a hammer. Plus, the method also varies: you could either unscrew it or tap it out.
Step 5: Setting the Rubber Washer
For this step, start sliding the rubber washer over the wires of the motion sensor. This should also go over the threaded nipple.
Keep in mind that this step may be optional. Some sensors already have the rubber washer attached from the moment you get it out of the package.
Step 6: Mounting the Sensor
With everything ready, grab the wires of the motion sensor and insert them through the knockout hole. Then, start screwing the sensor.
Make sure it’s tight to prevent potential issues. If, by any chance, there are no pre-existing threads, attach the sensor to the wall box using the lock nut included.
Step 7: Preparing the Wires
This step is a bit tricky, so take your time. Using wire strippers, start removing insulation from the ends of each wire in the box.
Ideally, you want to remove around 3/4 inches of insulation if it’s necessary. This amount should be enough to establish solid and secure connections.
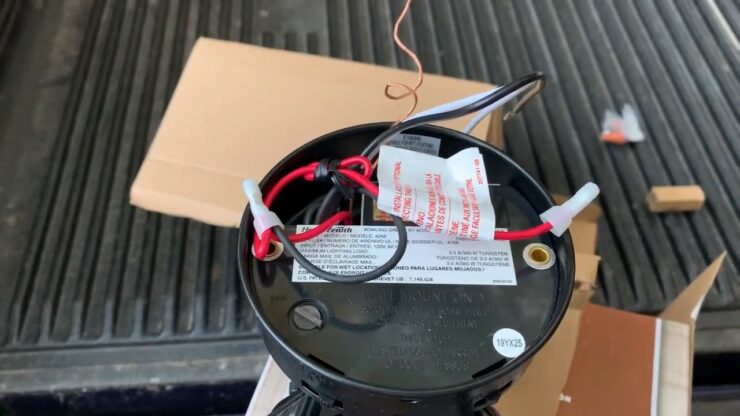
Observation: Pay attention to the wires. For later steps, their colors will become very important. So, take your time and familiarize yourself with all of them.
Usually, there are black, red, and white wires coming out of the motion sensor. Leading to the next fixture should be a black, white, and ground wire.
Lastly, out of the wall should be coming out cables with colors black, white, and ground wire. These are the feed wires.
Step 8: The Black Wires
Attach the black wall wire to the motion sensor’s own black wire. Once you do, secure both tightly using a wire connector.
Then, use electrical tape to wrap around the connection and keep it safe.
Step 9: The White Wires
The white wire of the wall must connect to the motion sensor’s white wire. Then, connect the white wire that leads to the next fixture with the white wire of the current light fixture.
After doing that, do just as you did before: use electrical tape and a wire connector to secure the connections.
Step 10: The Ground Wires
All ground wires must connect in the same manner together. Secure snuggly using wire connector and electrical tape.
Step 11: The Red Wire
Start connecting the red wire of the motion sensor to the black wire of the present fixture. Then, connect the black wire that leads to the upcoming fixture. Like before, secure the connections correctly.
Step 12: Putting Everything Back
Once you finish with the connections, place the wires back inside the wall box. Follow up by securing the outside light fixture to the box as well.
Step 13: Final Steps
Put the light bulbs up, and activate the circuit. Make sure the switch is on and leave it that way for a while. All fixtures must turn on and then off automatically.
After the sun sets, proceed to adjust the motion sensor’s sensitivity and range. This way, you’ll make it work just like you want it.
And that’s it! Those are all the steps needed on how to wire a motion sensor to two lights.
Common Problems of Wiring A Motion Sensor to Multiple Lights
Situation 1: After hooking up two motion sensor lights in parallel, the wires go from switch to receptacle one and then receptacle two.
This should be more than enough to turn the lights on and off flawlessly, but that’s not the case. When the switch gets turned on, the lights are inconsistent. They go on and off in an odd sequence, and the motion sensor doesn’t seem to work either.
- Possible Cause. This issue may happen regularly, and it may not have anything to do with your procedure. For example, the problem might be happening because the motion lights are not suitable for the same switch. Connecting two or more can be confusing, meaning that one light works in one mode while the other in a whole different mode. Before doing this, make sure to read the manufacturer’s guidelines first.
Situation 2: After installing the motion sensor and lights, they continue to come up even if there’s no movement nearby. What’s happening here?
- Possible Cause. The cause of this problem could be that the motion sensor’s aim is towards a street or areas where wildlife roams during nighttime. Most sensors allow you to set their aim, so make sure to adjust it as necessary.
Situation 3: Despite making flawless connections, the lights aren’t coming on at all.
- Possible Cause. Like the previous situation, this issue may be happening because of the sensor’s aim. If it’s aiming at the ground, then the lights won’t come up as needed. Again, check the motion sensor’s aim and adjust it.
Situation 4: The motion sensor used to work just fine, but it hasn’t detected movement lately. Why is this?
- Possible Cause. A potential solution to this issue can be as easy as doing some maintenance. Dirty sensors can’t work correctly, which will affect their performance inevitably. If you suspect this is happening to you, try using a wet rag to wipe it clean. After the cleaning, test the lights once again.
Situation 5: The lights turned on/off permanently. What now?
- Possible Cause. Interruptions in the electrical supply can severely affect the lights. This could include power outages, power surges, and others. Luckily, there’s a quick and effective method that might solve this problem. Try shutting off the power supply at the switch for thirty seconds. During this time, make sure there’s no movement at the front of the motion sensor. When the time is up, turn on the lights and test them.
Other Considerations to Keep In Mind
Consider the Sensibility. Motion sensors with high sensibility may get triggered with the slightest movement. So much so that even insects will turn on the lights inadvertently.
You also don’t want it to be too low, or the lights won’t react unless you’re too close. Adjust the sensibility as much as needed until you find it adequate.
Light Duration. Motion detector lights also have a setting to adjust their light duration time. It can be up to 30 minutes or more, so change it accordingly to match your preferences.
FAQs
Is it possible to connect two motion lights on the same circuit?
Yes, it is possible to connect two motion lights on the same circuit. However, it is important to make sure that the total wattage of the lights does not exceed the capacity of the circuit. The wattage of each light can usually be found on the packaging or in the manufacturer’s specifications.
It is also important to consider the distance between the lights and the motion sensor. If the lights are too far apart, the sensor may not detect movement in certain areas. In this case, it may be necessary to install additional sensors or use a more powerful sensor that can cover a larger area.
Additionally, it is recommended to use the same type and brand of lights to ensure they work together seamlessly. It is also important to follow the manufacturer’s instructions and wiring diagrams carefully to avoid any potential electrical hazards.
How to keep motion sensor lights on permanently?
Motion sensor lights are designed to turn on and off automatically when they detect movement within their range. However, there may be situations where you want to keep them on permanently, such as when you’re having an outdoor party or when you want to deter intruders.
Here are some ways to keep motion sensor lights on permanently:
- Locate the switch: Many motion sensor lights have a switch that allows you to turn them on and off manually. Look for the switch on the light fixture or in the electrical box.
- Adjust the settings: Some motion sensor lights have adjustable settings that allow you to control the sensitivity, duration, and range of the sensor. Check the user manual for instructions on how to adjust these settings.
- Cover the sensor: Covering the sensor with a piece of tape or cardboard will prevent it from detecting motion and keep the light on. However, keep in mind that this method may not be safe or practical, especially if the light is located in a high traffic area.
- Use a timer: You can use a timer to keep your motion sensor lights on for a set amount of time. Plug the lights into an outdoor timer or smart switch and set it to the desired time.
- Use a separate switch: If all else fails, you can install a separate switch that bypasses the motion sensor and keeps the light on permanently. This method will require some electrical work and should be done by a professional electrician.
Can you cheat motion sensors?
It’s a common belief that using a piece of styrofoam to shield your body can cheat the motion detector system.
You can also reset them by pointing at them with a light stick of a specific wavelength. This could be infrared or near-infrared.
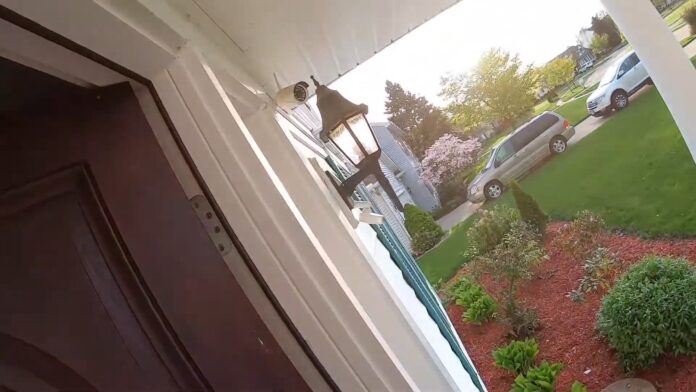
Can you add a motion sensor to existing lights?
Yes, but there are better ways. For instance, using a remote-style motion detector may be the most suitable option.
This can connect to most decorative fixtures, even those already installed. Watch this video for more guidance on how to do it.
How to cover motion sensors?
Covering motion sensors is not recommended as it can interfere with the proper functioning of the sensor and compromise the security of your property. However, there may be situations where you need to cover the sensor temporarily, such as during a party or event. In such cases, here are some steps you can take to cover motion sensors:
- Determine the type of motion sensor: There are two types of motion sensors, active and passive. Active sensors emit infrared radiation that detects motion, while passive sensors detect changes in temperature. Depending on the type of sensor, you may need a different type of cover.
- Use a temporary cover: If you need to cover a motion sensor temporarily, you can use a temporary cover made of cardboard or paper. Cut a piece of cardboard or paper to fit over the sensor, and secure it in place with tape or a rubber band. Be sure to remove the cover once you no longer need it.
- Use a permanent cover: If you need to cover a motion sensor permanently, you can use a cover specifically designed for this purpose. These covers are made of plastic or metal and are designed to fit over the sensor without interfering with its function. You can purchase these covers online or from a hardware store.
- Adjust the sensor settings: If you need to cover a motion sensor permanently, you may be able to adjust the settings to reduce the sensitivity of the sensor. This can help prevent false alarms and reduce the number of times the sensor is triggere
Verdict
Once you know how to wire a motion sensor to multiple lights, you’ll be eager to start working on your own project. Gather the tools necessary, and get to work.
Once it gets done, both the motion sensor and the lights will work beautifully together. The outside decoration and security will never be the same.


